I have always loved tamales, and frequently order them in Mexican restaurants. Now that we're really trying to stretch one paycheck as far as possible, I decided I'd try to make tamales again. They're great for using inexpensive cuts of meat, so when Safeway had pork loins on sale I bought one and reserved a large chunk for tamale filler. The rest of the ingredients border between inexpensive and down right cheap!
Years ago I asked the mother of one of my childhood friends if she would show me how to make tamales. In many Mexican households they are the fiesta meal for either Christmas Eve or New Year's Eve. Emparo welcomed me into her home and tried to school me on the intricacies of tamales. I was much younger then, and had less patience, so the whole process, while fascinating, left me thinking I could live the rest of my life on Hormel tamales that dump out of a can. Oh my, how I've changed! Now I appreciate the work involved in special meals and feel it's totally worth the effort.
This time around I started where I generally do - searching the internet for recipes and video clips. I got a couple of good ideas, and of course changed almost everything about the originals. I planned on this being a two day process - one day to slow cook the filling, and another day to wrap the tamales.
Pork Tamale Filling - Teacher Karen style (approx. 2 dozen)
1 1/2 - 2 lbs pork (chicken, beef, elk etc.)
1 large onion, diced
1 green pepper, diced
2 dried ancho chile peppers, stemmed, seeded and diced
3 cloves garlic
1 1/2 tsps. salt
1 cup water
Season to taste: I put in a couple tsps. cumin, 1 tsp. chili powder, - and added more heat/salt after everything was cooked. Spice is one of those things you have to determine for your own family's taste buds!
Slow cook the meat, veggies and spices until cooked through, and tender enough to shred with a fork. You can use a crock pot or dutch oven - whatever your preferred method.
Once this was cooked, I drained off excess fluid/juice and added a prepared enchilada sauce for some extra kick and flavor.
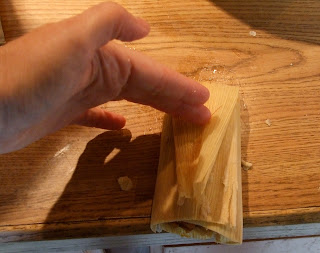
Soak corn husks in hot water for 20 minutes to a half hour. You don't want any part of the husk to be crunchy, or it will tear when you try to spread on the masa.
 |
| This dough is too hard! |
Tamale Dough:
2 cups masa
1 can (10.5 oz) beef broth (you could sub. chicken, or veg. broth depending on your filling)
1 tsp. baking powder
1/2 tsp. salt
2/3 cup vegetable shortening
(I ended up adding at least another cup of water to this mixture to get the consistency right)
1 pkg. dried corn husks.
 |
This dough is just right! See how spreadable it is?
Spread masa on the big end of the husk.
It works best if the husk is in your palm. |
 |
I prepped several husks at a time before
filling and folding them. |
Okay - here's the tricky part: getting the masa dough the correct consistency to spread onto the husks. This is where the patience of my younger self was tested to the breaking point. I remember just getting so frustrated. This particular recipe called for some shortening, which I think helps in this department.
You don't want your dough the consistency of cookie dough, but smoother, like mashed potatoes. I guess the best rule of thumb is, if you're fighting it or breaking your husks, add more water to the dough. I used the back of a spoon to spread the masa across the husk. Be forgiving. What looks like a ridiculous mess all comes together once they are steamed and holding their own shape!
 |
| Place filling in the center |
 |
| Fold over one side. |
 |
| Fold over the other side. |
 |
Fold over the small end of the husk, leaving the big end open.
This method is called (by one YouTube video artist)
The Baby Tuck!
|
 |
or in a container for freezing.
|
 |
Place the tamales in a steamer...
|
Many of the recipes I looked at on line call for you to wrap extra husks around the prepared tamale. This protects them from water during the steaming process.
Place tamales in a vegetable steaming basket, open side up. You can place a wet towel in the center and set the tamales around it, forming a cone shape. Place a 1-2 cups of water in the bottom of your cook pot - not enough to come up into the steamer basket and moisten the tamales. Most recipes call for steaming anywhere from 40 minutes to an hour. To test for doneness, remove one tamale from the pot, and gently unwrap the husk. If the masa is still clinging to the husk, it's not ready yet. Don't rush this process or you'll end up with wet, mealy tamales.
Once you think your tamales are cooked, allow them to cool a bit before unwrapping the husks. This makes it much more likely to remove them in one piece!
If you want your tamales served up restaurant style, you can cover them with some enchilada sauce, a sprinkling of cheese, and do a quick heat under the broiler.
*If you are a vegetarian, create your own filling, and when preparing the masa, just use spices and water, or add vegetable broth. I've had some delicious veggie tamales stuffed with peppers, onions, chiles, and cheese!


