About Me

My photo
I am a wife, mother, teacher, runner, baker, fund-raiser, reader, watcher of movies, dog-lover, writer, music-lover and foodie. So - I'm a woman of many moods! I write and share in order to teach and enrich. I currently have two blogs going: The Kitchen Refugee, and A Mile At A Time. The first is about time spent in the kitchen and the second about time spent on the road. Frequently the two roads intersect!

Friday, April 13, 2012

Oodles of Noodles


One of the things I've really been enjoying lately is homemade noodles.  Originally, I had thought about getting one of those fancy noodle-making attachments for my Kitchenaid mixer, but they're really expensive!  I couldn't really justify having a $300 Playdough hair maker!

Lucky for me, I was watching an episode of Anthony Bourdain's No Reservations, and he was in Italy.  He was in the home of an Italian grandmother, and she was the kind of woman who mixes her noodles right on the countertop.  The next thing she did completely boggled my mind - she rolled the dough out, floured it liberally and rolled it up cinnamon roll style, and then cut them!  It looked so easy!  I figured even I could manage that method, so I got to looking up noodle recipes.Many of the recipes I found online called for semolina flour.  This was a new purchase for me so I went with the Bob's Red Mill (http://www.bobsredmill.com/) brand, and I used the recipe from the bag.  The consistency is perfect and the dough is really easy to manage.

Recipe:
3/4 cup semolina flour
3/4 cup white flour (or wheat)
½ tsp salt
2 eggs or 3 egg whites (or equivalent egg substitute)
2 TB water
2 TB olive oil


Mix all of it together with a fork until it forms a dough ball and all the flour is mixed in.  Cover, and let rest for 30 minutes.  The dough doesn't rise, it just says on the package that it needs to rest.  I interpret this to mean that the cook should pour a glass of wine, and kick back for a half an hour.


When it’s time to make the noodles, generously flour the counter and roll the dough out as thin as you can.
 You should be able to see the counter through it.


Next, flour the surface of the dough and roll or fold it, 
making sure that every exposed side of dough gets dusted with flour - you'll thank me later! 
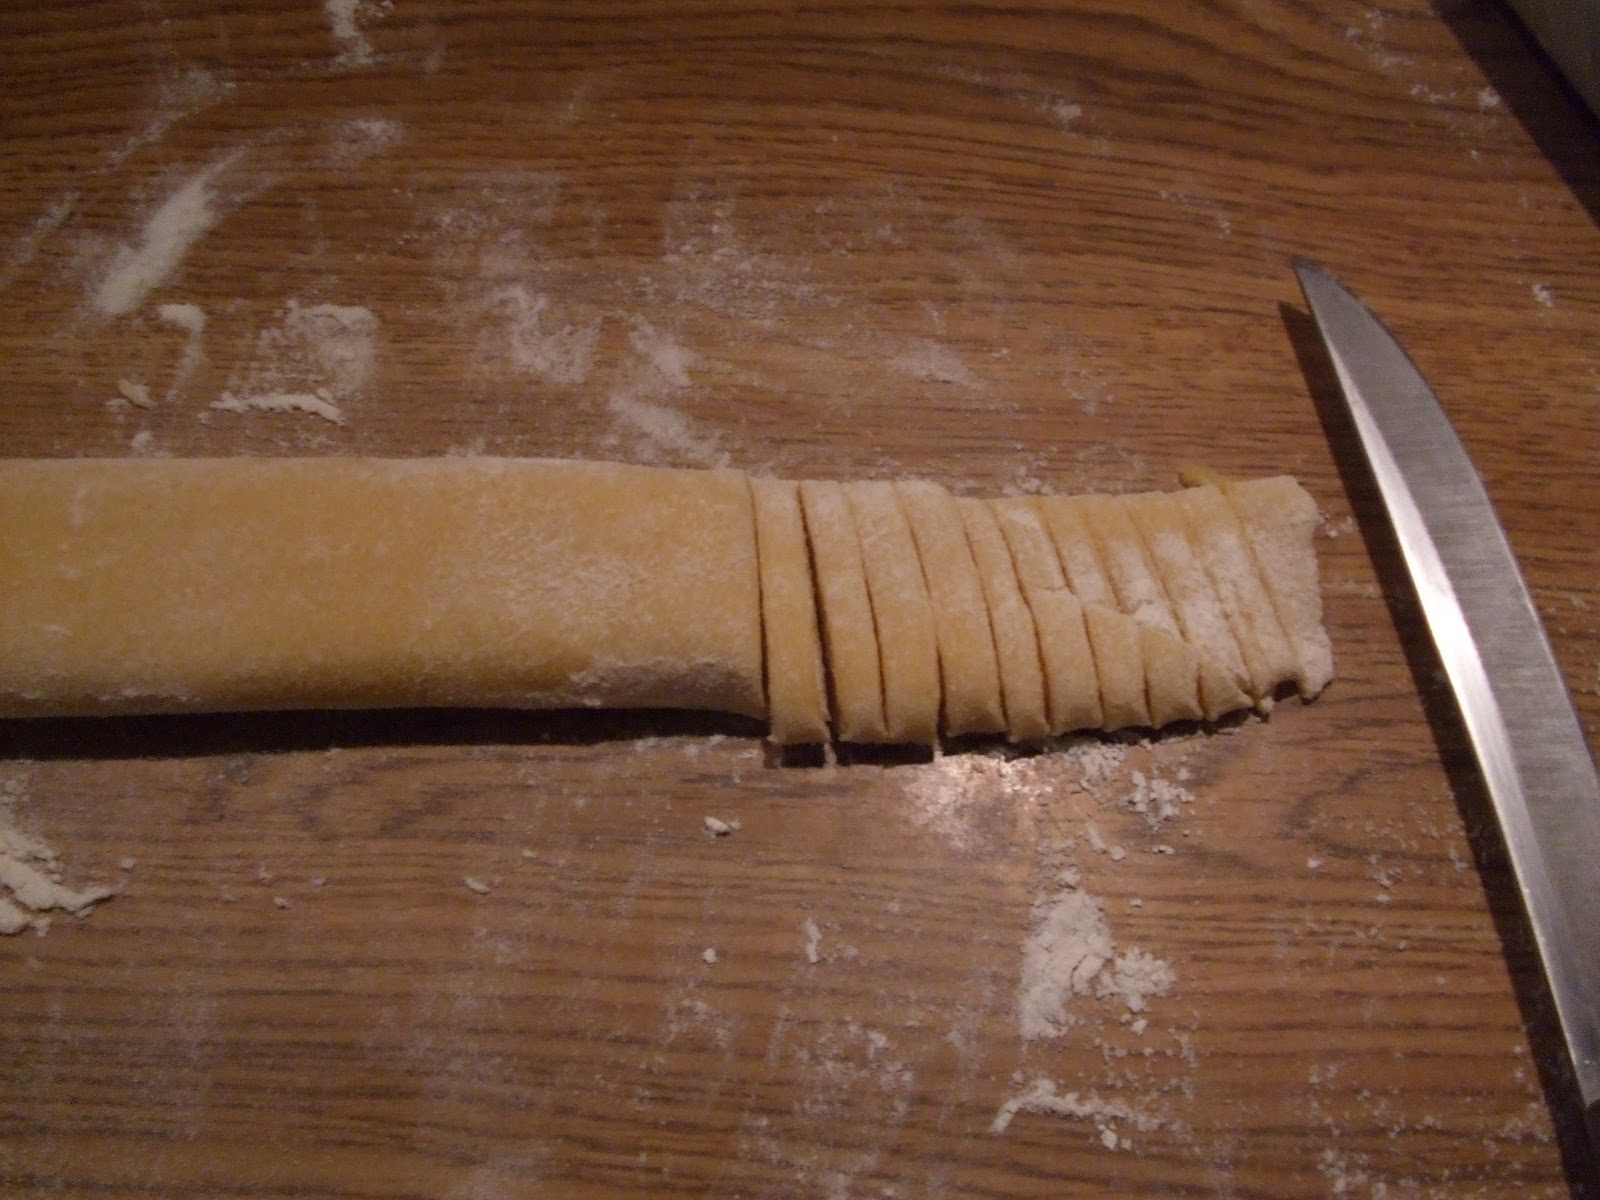


Once you have the dough rolled up, cut noodles as 
wide or narrow as you wish. Obviously, with this method,  you can't make spaghetti, but I can live with that!  
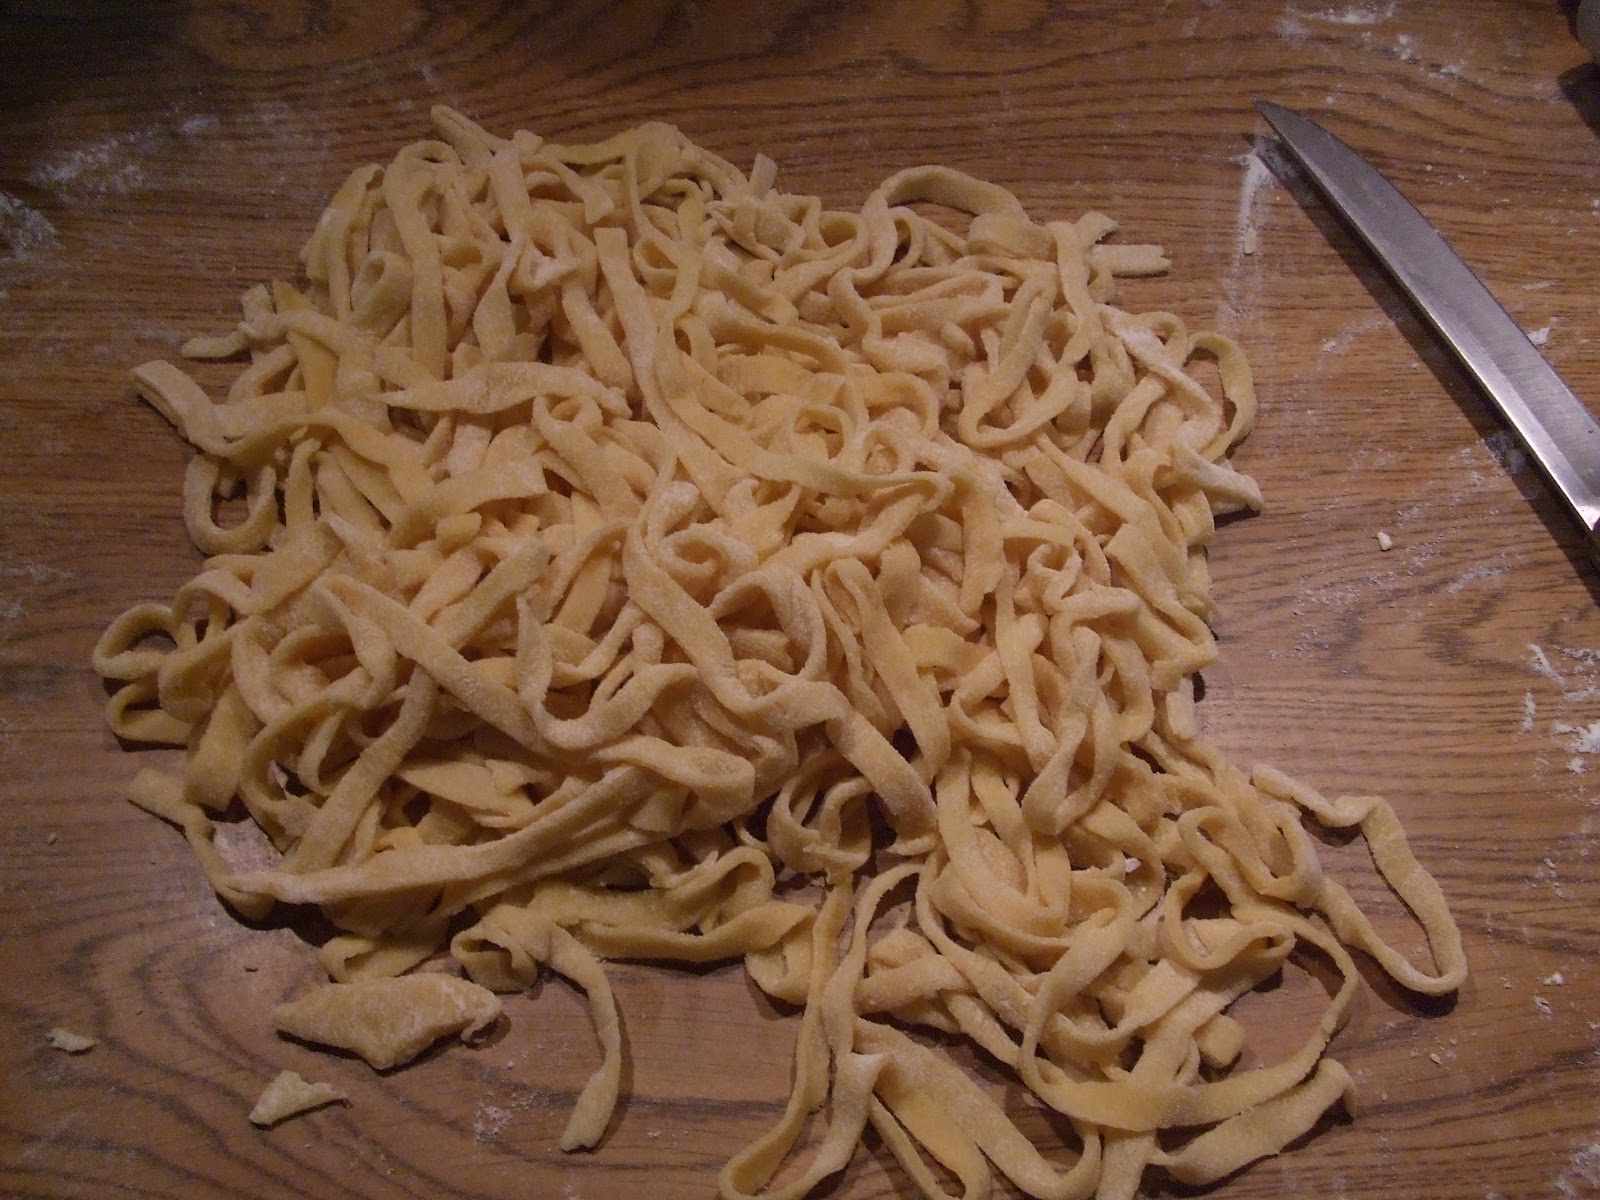


This is when I call for my hubby to come help unfurl the noodles.  If you have floured well, you can grab one end and fling them out like little ribbons.  The last time I made them, I realized that if I’ve floured properly, I don’t even have to handle them individually - I can gently shake them loose, a handful at a time.  That's all there is to it!


I know many people dry their noodles, but we prefer dropping them straight into boiling water.   I have frozen them before, and I don't think the texture is as good. It wasn't worth saving a few minutes of work at the end of the day.  We are both so spoiled with these noodles that I've stopped buying noodles at the store.  This dough can be cut wide for lasagna, or like egg noodles for stroganoff.  

This recipe is simple, and good.  I even make noodles on weeknights (but save myself some time with frozen sauce - homemade, of course).
You can do this - I promise!


Sunday, April 8, 2012

Designer Cupcakes

I love how cupcakes have become the new 'thing.'  A cupcake can go from childhood treat to festive grown-up fare with just a change of dressing paper.  There are a milllion new blogsites about cupcakes, so I won't go into too much detail here, but I will direct you to some new sites I've found.

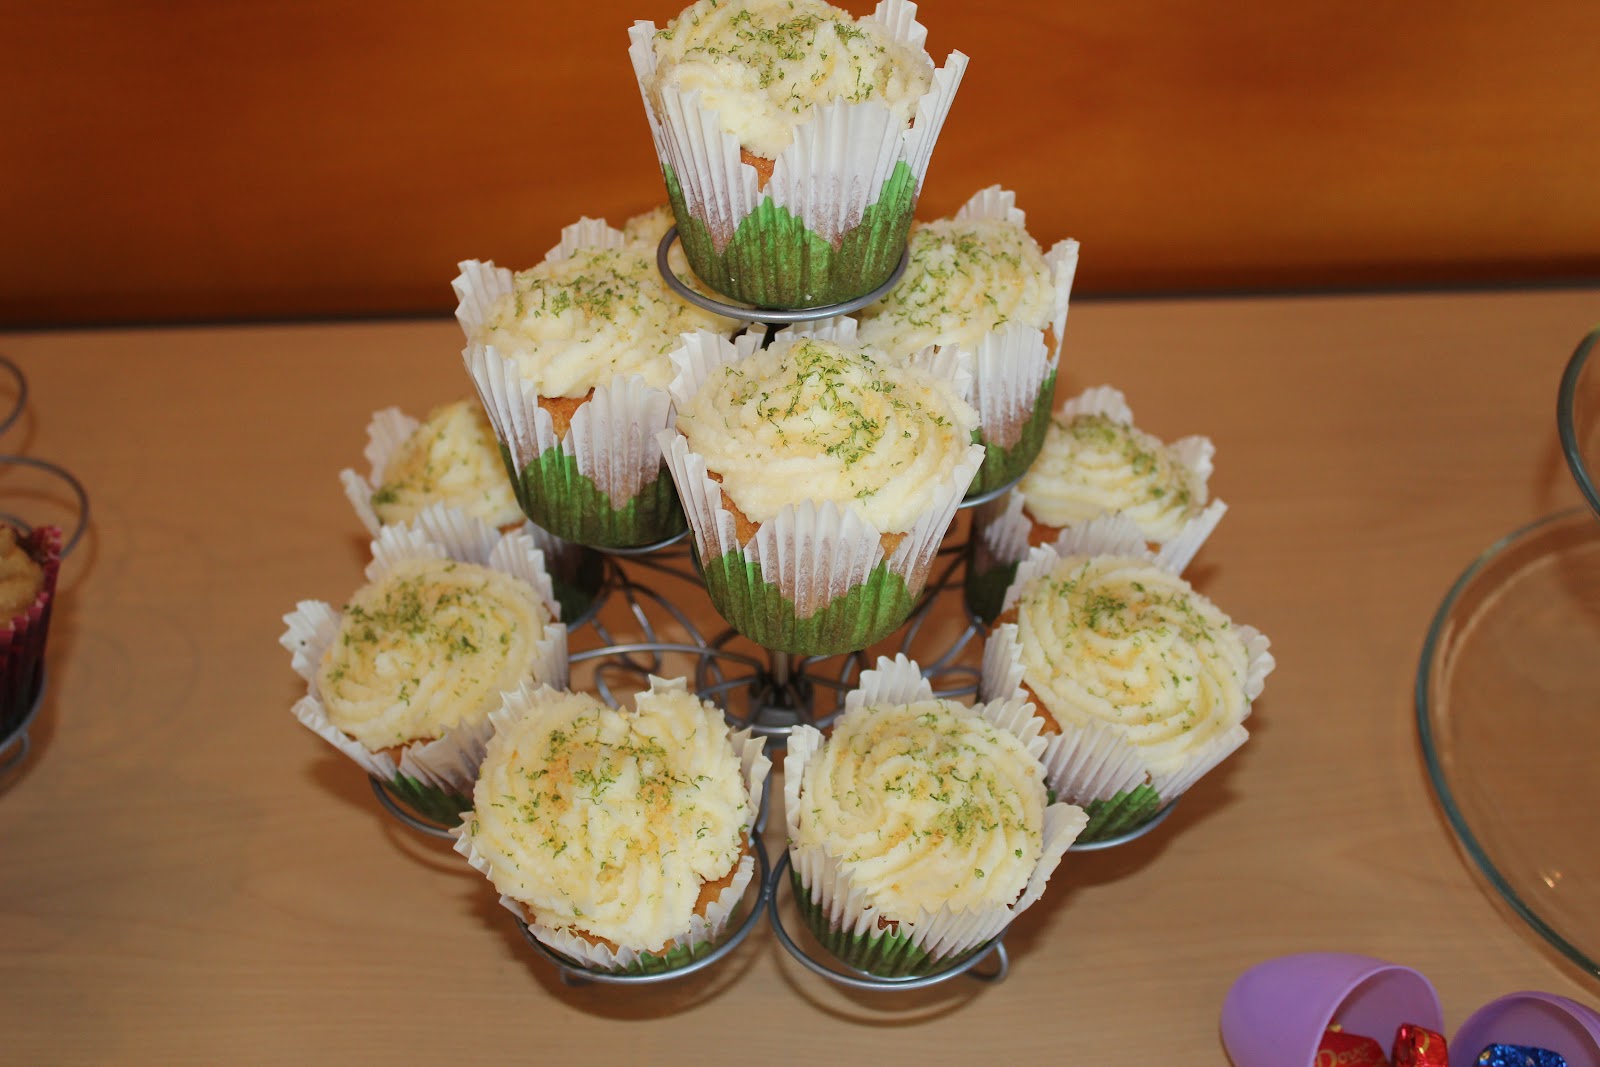
This weekend, we celebrated my mother-in-law's 80th birthday.  It was a great weekend filled with friends and family.  I hadn't really planned on serving cupcakes until some festive papers caught my eye - at Wal-Mart, of all places!  In the cake decorating/weddding isle, they had cupcake papers that looked like little flowers.  My mother-in-law is an avid gardener and has a yard that would make pixies envious.  Once I saw those papers, the theme came together, and the more I thought about it, making a variety of cupcakes meant two things: guests would have choices, and no one would have to serve cake!  Perfect!

I spent the next six weekends trying new recipes, and making notes about things to change or adjust.  My husband's workmates were the perfect recipients of all my experiments.  I would sample one cupcake and send the rest to the warehouse where they would disappear.  My biggest problem was in deciding which recipes would make the cut - I knew I'd have to draw the line somewhere.

One of my new guilty pleasures, is Pinterest www.pinterest.com.  I'ts like an online scrap book for grown-ups.  One can lose many an hour just looking at pretty pictures, many of which involve FOOD!  I found a couple cupcake recipes on Pinterest.  You can follow these links to the recipes.


Key Lime Pie Cupcakes


These were really wonderful!  There are graham cracker crumbs mixed in the batter, and it really gives a great taste to the cake.  I added some lime zest to the batter (my only alteration to the recipe).
The lime/cream cheese frosting is delightful, and the dusting of graham cracker crumbs and lime zest add to the display!


Coconut Cream Cupcakes


This recipe is also very good.  The one change I made, however was in the filling.  The original recipe calls for toasted coconut in the filling, and I felt that the crunch took away from the creaminess.  When I made them for the party, I just used the coconut untoasted.  A little toasted coconut made them look pretty, but didn't detract from the texture.   Mmmm....yummy!

For my own birthday, in March, I made special St. Patrick themed cupcakes for my kindergarten friends.  It was a lot of work, but they made a spectacular showing that only five-year-olds could really appreciate.  I'm sad to say that I used a box mix for these - I was tired.  So - I used a white cake mix, and then separated the mix into Gladware to add food coloring.  I'm also embarrassed to say that my mind must've been particularly fried that night because I failed to mix a couple of the desired colors.  Oh well - that's when I had to say "it's good enough for kindergarten!"

Once the colors were created, I realized that I would have to spoon 7 layers into 24 cupcakes.  Bleh!  What have I done?!  I'll tell you right now, that unless you are making a rainbow CAKE, where you pour each color into it's own layer pan, you will not get actual, separated, colors.
It was a good idea, but it came out more like tie-die than rainbow! 
 Oh well.

 To top off my St. Pat's cupcakes, I did plain, white buttercream frosting and added gold 'gem' sprinkles and a gold-wrapped rollo.  (Of course, during my many trips to the store, I FORGOT to shop for chocolate coins! - once again: good enough for kindergarten!)  The kids totally got the reference to gold at the end of the rainbow, and were completely delighted with my efforts.  That's why I love them so!  :-)


Whether you spruce up a cupcake with a fancy paper, piped frosting, or special sprinkles - they are always festive and everyone loves them.  Years ago, one of my kindergarten friends (who is now old enough to write her own blog http://themadisonyoung.com/ ) laid down some 5-year-old wisdom after eating a birthday cupcake at school.  With a big, contented, sigh, she said, "Aren't cupcakes just...enough!"  Oh - yes, they are!

Thursday, February 3, 2011

Greece without Grease! (Biggest Loser Breakfast reinvented)

I've been eating Biggest Loser Broccoli Frittatas for a month now, and I'm ready for a change!

I changed up the veggies and cheese, but kept the measurements the same.  Since fetta is a dry cheese, the fat and calories aren't too bad.  The package label said there's 60 cal./3 g. fat per 1/4 cup.  You can do the math to figure out how much is in 1 tsp!

Greece without Grease
• Chopped, steamed spinach (I cut fresh leaves and microwaved them for 1 minute)
• Finely minced onion
• Fetta Cheese
All Whites or other egg substitute

Preheat oven to 350º.

Spray a muffin tin with cooking spray.
Place 2 TB of chopped, steamed spinach per muffin cup.
1/2 tsp. minced onion per cup.
1 tsp. fetta cheese per cup.
1/4 cup egg substitute per muffin cup.
Sprinkle of course black pepper per cup.

Bake 15-20 minutes until egg is set.

I'm the only one who eats these, so I generally cook 6 at a time.  2 muffin cup helpings is 1 serving.
It's a nice variation.  I can almost pretend it's spanakopita...without the butter, and phyllo dough!

Sunday, January 30, 2011

Indian Chicken Curry and Naan

Sunday seems to be my busiest day in the kitchen.  In fact, I better stop procrastinating my homework because I keep finding myself torn between my kitchen and the computer, with a 5:00 deadline looming.
I love to putter in the kitchen, and Sunday is generally the day I make sandwich bread, granola if we're out, and something new and interesting.

My daughter sent me this recipe after she had found it at allrecipes.com.  It's easy, and delicious.  It's also quite hot, and although Alli chose to add MORE cayenne pepper, I chose to use less!  It had plenty of kick already!

Indian Chicken Curry II 
Ingredients:
• 3 TB olive oil
• 1 small onion, chopped
• 2 cloves garlic, minced (I added more!)
• 3 TB curry powder (I used 2 rounded)
•1 tsp. cinnamon
• 1 tsp. paprika
• 1 bay leaf
• 1/2 tsp. grated fresh ginger root
• 1/2 tsp. white sugar
• salt to taste (I used 1 tsp. after starting with 1/2)
• 2 boneless, skinless chicken breasts, cut into bite sized pieces
• 1 TB tomato paste
• 1 cup plain yogurt (I used non-fat)
• 3/4 cup coconut milk (I used 'light')
• 1/2 lemon, juiced
• 1/2 tsp. cayenne pepper (I used a dash!)

Directions
1. Heat olive oil in a skillet over medium heat.  Saute onion until lightly browned.  Stir in garlic, curry powder, cinnamon, paprika, bay leaf, ginger, sugar and salt.  Continue stirring for 2 minutes.  Add chicken pieces, tomato paste, yogurt, and coconut milk.  Bring to a boil, reduce heat, and simmer for 20-25 minutes.

2. Remove bay leaf, and stir in lemon juice and cayenne pepper.  Simmer 5 more minutes.

Serve over rice, or with naan.


Naan 
This recipe comes from The Bread Machine Bible, by Anne Sheasby. My bread machine kicked the bucket, so I'm adapting the recipes.  If you have a bread machine - dump in all the ingredients and set the machine to "Basic Dough" or "Pizza Dough." 


Ingredients:
• 1/2 cup milk (at room temperature)
• 4 TB plain yogurt (at room temperature)
• 1 TB sunflower oil (I used olive oil)
• 2 cups + 2 TB white bread flour
• 1 tsp. salt
• 1 1/2 tsp. sugar
• 1 tsp. instant dry yeast
• about 3 TB melted ghee or butter (I omitted this)

Directions:
1. Pour milk into a bowl, add the yogurt and oil and whisk well.  Sprinkle in yeast and let stand for 5   minutes.  Add the rest of the ingredients (except butter) and mix until it forms a ball of dough.

2.  Cover the dough and let rise until doubled in size.

3. Punch down the dough and divide it into 4 equal pieces.  Roll out each piece to form a flat oval or teardrop shape, approximately 1/4" thick.  Cover and leave for 15 minutes.

4. Preheat oven to 450º F. (I just realized I only cooked the bread at 350º since that's what it was already set at for the granola! It still worked out!)  Put a cookie sheet in the oven to heat.  Place naan breads on the hot cookie sheets and brush with melted butter.  Bake 10-12 minutes until puffed.  Wrap in a clean dish towel and serve warm.


Saturday, January 29, 2011

Treats for Man's Best Friend

Are you rolling your eyes at the title?
Thinking I've lost it completely since I'm cooking for my dogs?
Well, I don't have any kids at home.  I have a new mixer AND a new eating plan, so this gives me the satisfaction of baking for an appreciative audience! They NEVER complain!  (Of course, they have been known to eat their own poop...)

This recipe came with the dog-bone cookie cutters I bought at Bella (www.bellabakercity.com).  I saw them and thought they were a fun novelty.  The recipe is easy, and I like knowing exactly what I'm feeding my dogs.  There's no 'mystery product' or excess fats.
Dave's Good for Your Dog Biscuits

Classic Christmas photo - they all look like I've just beaten them!
• 2 cups whole wheat flour
• 1 cup rolled oats
• 1 cup unbleached white flour
• 1/2 cup corn meal
• 1/4 cup wheat germ
• 1 cup beef, chicken or vegetable stock
• 1/2 cup non-fat dry milk
• 1 egg, beaten
• 2 tsp. instant dry yeast
• 3 TB vegetable oil
• 2 TB molasses
• 1 tsp. salt
• 1 tsp. garlic powder
• 1/4 cup fresh parsley, chopped (OR 2 TB dried)

Baby Lilly 

Mix in heavy duty mixer, food processor, or by hand.  Knead in the last bit of flour by hand.  Cover dough and let rest for 1 hour.

Heat oven to 300º.
Roll out dough until it's 3/8" - 1/2" thick.  Cut into shapes with cookie cutters and place on a greased cookie sheet.  Continue to do this until all cookies have been cut.

Bake for 1 hour, turn off the oven and let biscuits remain there for another hour until very hard.  Keep in an airtight container...out of paw's reach.
Your dogs will thank you!

                             
       Earl 
Annie (best shelter dog ever!)


Earl & Lilly take a break from frisbee
and pose for the paparazzi!

Thursday, January 27, 2011

Biggest Loser Black Bean Hummus

This is another recipe I took from the 20011 Biggest Loser Calendar.  I've made some additions that should not change the calorie count at all.


Black Bean Hummus
1 can of black beans (they call for you to cook your own - not interested!)
1 can of garbanzo beans (or double the black beans)
2-3 cloves of garlic
1/2 cup silken tofu (silken refers to its softness.  I hadn't bought tofu before and learned something new when comparing packages)
2 TB Tahini paste
1 tsp. ground cumin
2 tsp. extra-virgin olive oil
juice from 1 small lime
1/4 tsp. salt
sprinkle of paprika
1/4 bunch of cilantro - leaves picked from the stems (this is my own addition)


Rinse the beans from their juice, then throw all of it in a food processor.  Whirl until well mixed and smooth.

Serving: 1/4 cup, 111 calories, 6 g. protein, 12 g carbs, 5 g fat (the good kind)


Dip in what you like.  I'm sure veggies are the best choice, but if I'm having it for a meal instead of a snack I've been eating it with Special K Multigrain crackers (17 crackers = 90 calories).  OR I put the hummus in a high fiber tortilla wrap along with a bunch of veggies/salad mix.  Yum!

Monday, January 24, 2011

Gorgeous Garlic Bread!

I tried out a new bread recipe today - I wanted something new to go with an old soup recipe!

This came from The Bread Machine Bible, by Anne Sheasby (ISBN:978-1-84483-795-3).  Since my bread machine is long gone, I followed the directions for the 'oven method' and mixed the dough in the mixer. It really can't be done in a bread machine anyway, except to mix and raise the dough.

Garlic Bubble Ring
Makes one loaf - (serves 12)

• 1 package (1 lb. 2 oz.) white bread mix  (mixed according to directions)
• 7 TB melted butter (I used light butter)
• 1 beaten egg
• 2 TB freshly grated parmesan cheese
• 2 cloves minced garlic
• 1/2 tsp. salt
• 2 tsp. dried herbs (I used Italian seasonings)


This is the mix I bought.  I found it in the baking
section with specialty flours.  I think that
any 1-loaf recipe would work if you prefer to
make your own from scratch.


1. Mix the bread mix according to the directions.
2. Let the dough rise until doubled in size.
3. Grease a 9-inch spring form pan fitted with a tube bottom (angelfood cake pan)
4. Combine melted butter, egg, cheese, garlic, salt and dried herbs in a small bowl and mix well.
5. Divide the dough into 12 equal balls, and dip them in the herb mixture, liberally coating them all over.
6. Cover and leave to rise in a warm place until doubled in size.


7. Preheat oven to 375º F.  Drizzle remaining liquid over the rolls, and bake for 30 to 40 minutes, or until bread is risen and golden brown.  (I cooked it for 35 minutes.  The top was well browned but the bottom seemed a little wet.  I removed it from the pan, set it on a cookie sheet and put it back in the oven for about 5 more minutes until the sides and bottom had browned more.)


8. Cool on a wire rack.  Pull rolls apart when ready to serve.


The dough is really light and the flavors are wonderful!  This was really easy, and I know it'll be one of those great party dishes that people will rave over!